Rendering into the wall(2d and 3d freely changeable material) tutorial.
Step 0.
A lot of people were impressed with 'Super mario odyssey' wall play. Of course I am. So I tried to make a 2d and 3d freely changeable material.

Step 1.
These are final assets. 'NoRanderingMaterial' removes the chest symbol of default character.
Duplicate default character material and insert new nodes just like image below.

This is larger screenshot. In this tutorial, only the x-axis value works.

Step 2.
Add new 'trigger box'. It toggles material parameter value.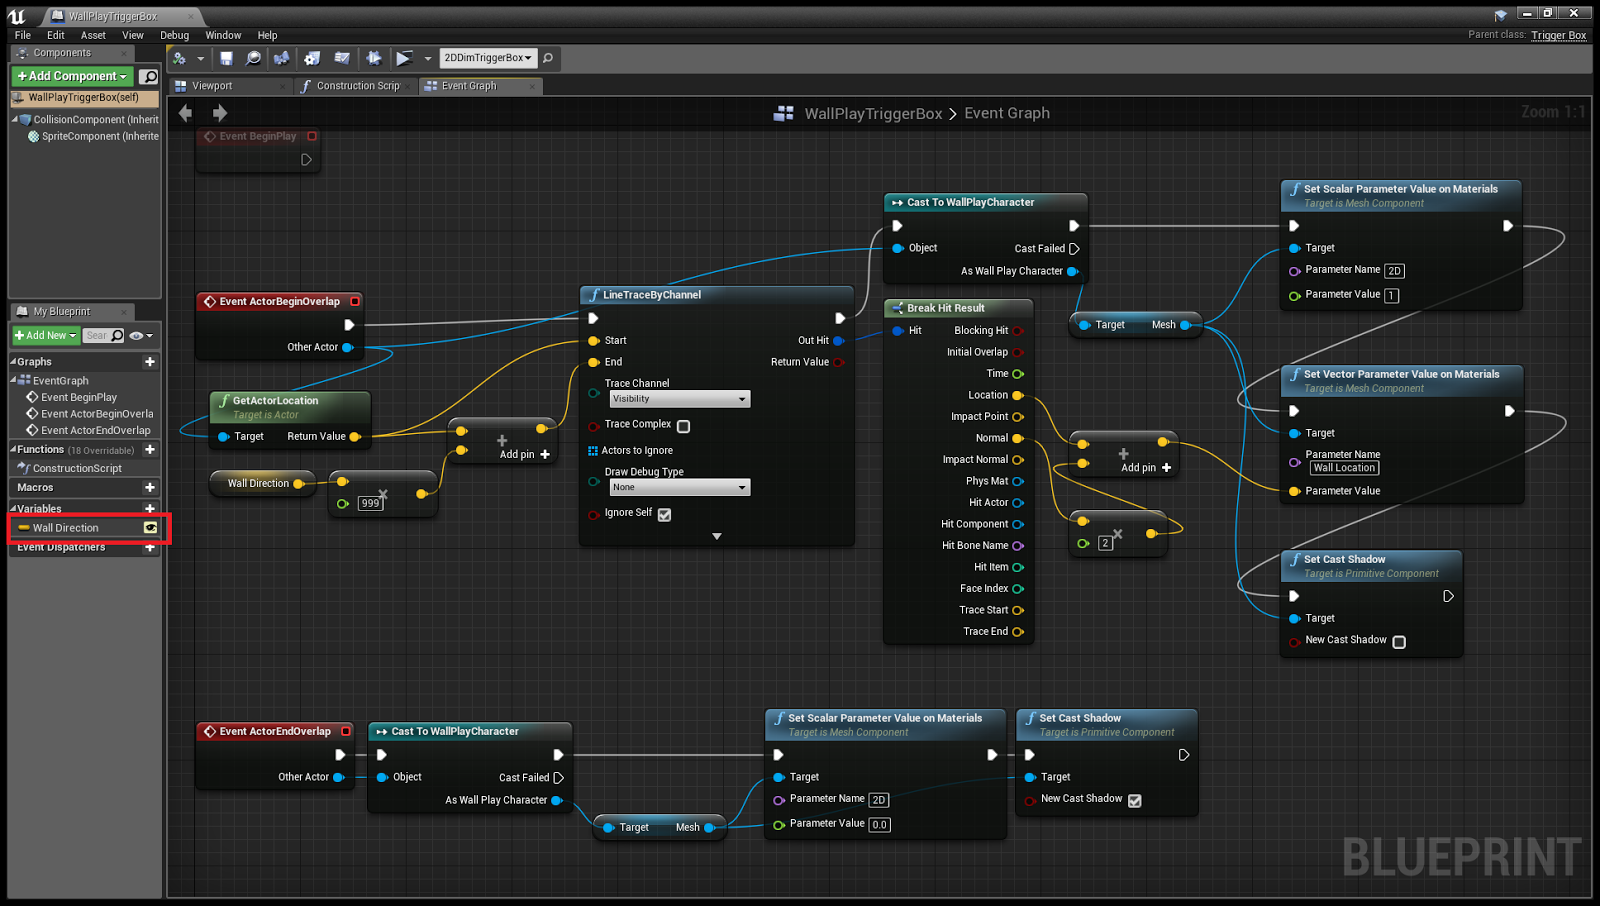
Step 3.
Setup wall trigger box into the level and change 'Wall Direction' value.
Step 4.
It's done.Type Console command 'Show Collision'. Real character actors are still stand in same location.

More...
There are so may issues to make it complete. Curved surface, actor collision, custom rendering in wall space...It is out of this example. Let's implement it one by one when it is an opportunity.


Comments
Post a Comment