Posts

Showing posts with the label Post Process

Post Process Material based zoom

Image
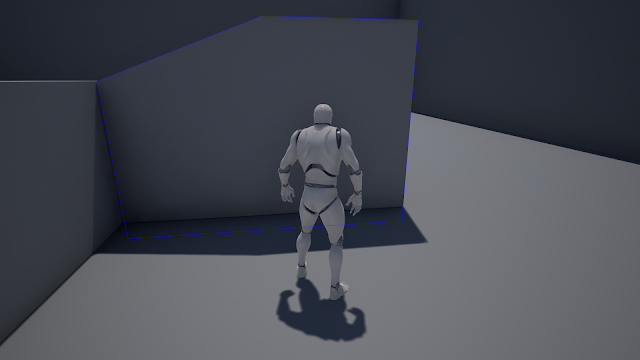
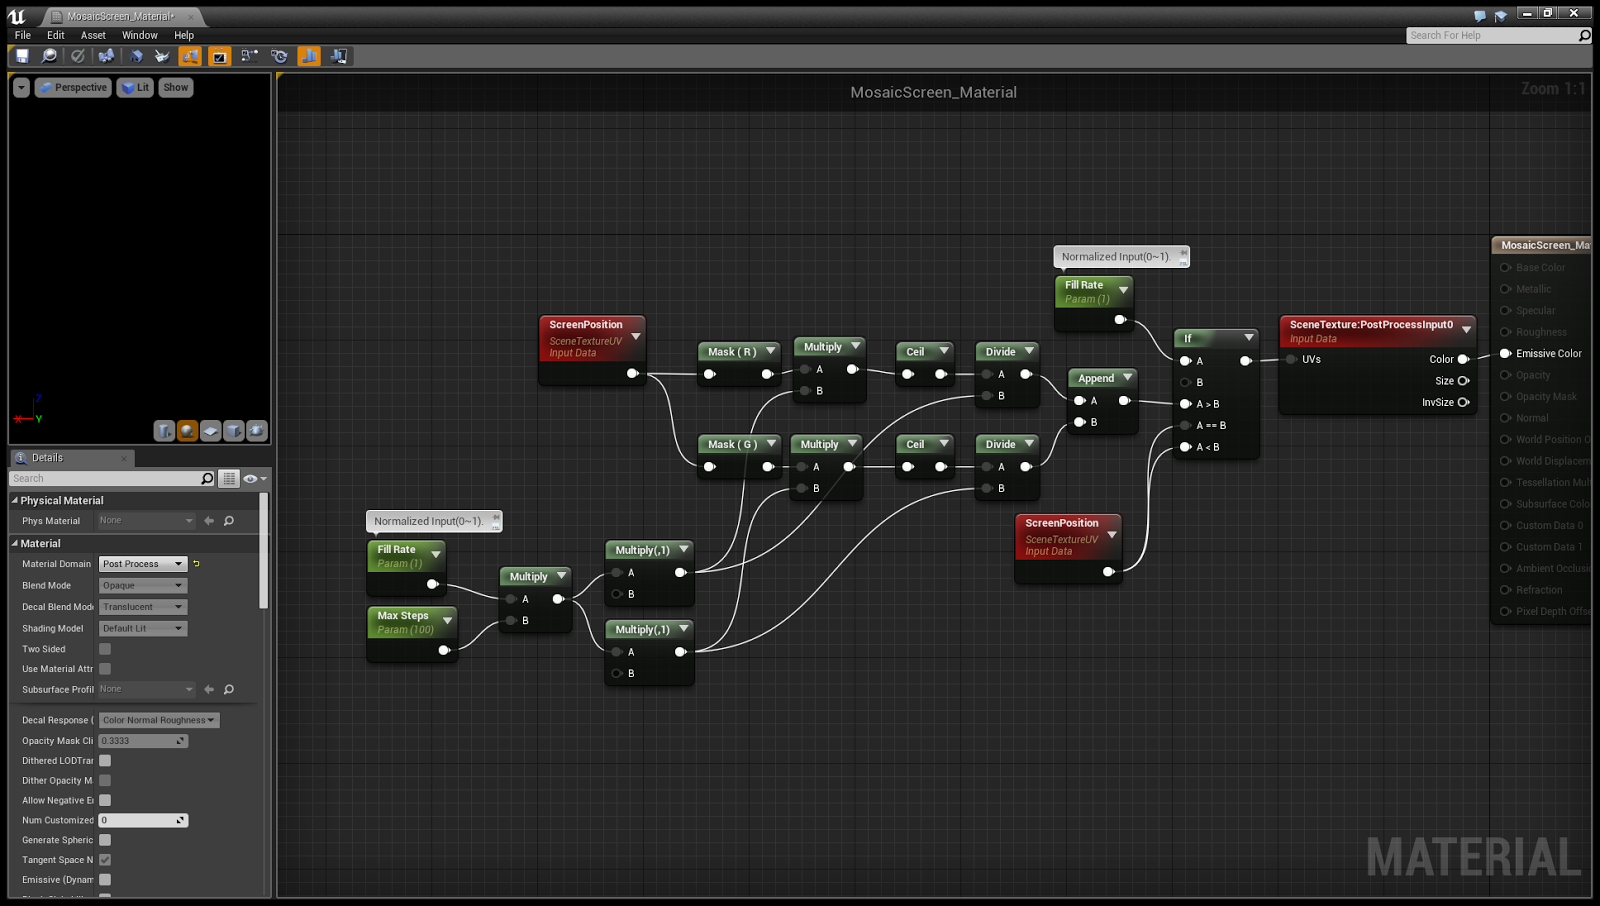
The scope zoom of the gun uses the FOV of the camera and 'Post Process Material based zoom' is not always the best choice. But it may be needed for special effects(if pixel enlargement is required?). And it is also good for learning because it is simple. Step 1. Basic This is the result. Step 2. Problem If you zoom out, there is a problem outside the image. Step 3. Remove outer area This is an improved version. Efficiently determine the outside and inside with Frac nodes. Step 4. Final

Customize 'Buffer Visualization' for RPG game field

Image
Related post : https://gameenginebread.blogspot.com/2017/12/visualize-game-stat-in-editors-viewport.html Buffer visualization is very useful for rendering issues. But you can use it for your own game content development too. Especially your game has large field and many monster spawn locations, you may need this. Step 1. Adding Buffer-Visualization is very easy. Open 'BaseEngine.ini' and set a post-process material. Step 2. Now, let's make materials for buffer visualization. We assume that 'custom depth buffer' is not available. And don't bother other systems. So, we need a trick. Use 'Metallic' and 'Roughness' for notification object pixel. Materials are very simple. You can understand without more description. Step 3. This is a Monster-spawn-location Blueprint actor. A very simple sample... Set the material and check 'Hidden in game' and 'Editor only' of that component. More. ...

Screen space outline(Post Process Material)

Image
Step 0. Mesh based outline : https://gameenginebread.blogspot.com/2017/09/how-to-draw-outline-without-stencil.html Mesh based outline looks good and easy to modify it's thickness and color. But it is too heavy to draw everything with outline mesh. So, in this post, we will make post process material based on outline for full screen outline. Step 1. The basic idea is to draw the outline using depth values. This is the final material. Step 2. These are the result screenshots.  Without outline. With outline. Remaining Issue. It is easy to apply but has various drawbacks. - It can't change thickness. - It is difficult to exclude outline on certain objects.

Unique 'Custom Depth Stencil Value'

Image
Step 0. In special cases, you need to set a unique value for all 'Custom Depth Stencil Value'. Step 1. It is hard to update it with blueprint. We have to change Unreal Engine 4 source code. Please see the image below. Result. Check 'Render CustomDepth Pass'. Move camera. You can see that each value is different. More. - Do not forget. The stencil value size is limited to 255. - You can also assign a new value by considering the original value(e.g. Assign automatically if >99). If so, you can use other stencil features.

Full screen afterimage material(Drunken effect).

Image
Step 0. Let's make a full screen afterimage material and character. It is usually used to show a drunken effect. Step 1. We need to capture current scene. It's very easy to do that with unreal engine 4. Add new render target texture. Increase size if you want better result. Step 2. Create new character class and add a sceneCaptureComponet2D to the character. Change properties(red boxes). Step 3. Create new post process material. Screen UV and rendered-texture UV do not match. So, we need to fix it. Step 4.  This is the character blueprint. Update the rendered texture with delay. It's done. These are final assets.

World scan effect material

Image
Step 0. Let's make a world(level) scan effect material. Step 1.  We can make it with 'Post Process material' with 'Absolute World Position' material node.  Use almost the same features as previous posts. Step 2.  Change material parameter. Step 3.  If you use other material domain instead of 'Post Process', you can get different effects.

Enhanced Outline Material

Image
Step 0. You can see how to make a outline material and an unsolved problem on the previous post(Can't see outline behind a outlined object). More detail :  Draw outline Step 1.  - Find file from Unreal Engine 4 source code(UE4 version 4.14) : Engine\Source\Runtime\Renderer\Private\CustomDepthRendering.cpp  - Remark SetDepthStencilState Operation and add new stencil buffer operation code. This code is a little bad to avoid 'expression must have a constant value' error. But you can make it better... /// Original. //RHICmdList.SetDepthStencilState(TStaticDepthStencilState<true, CF_DepthNearOrEqual, true, CF_Always, SO_Keep, SO_Keep, SO_Replace>::GetRHI(), CustomDepthStencilValue); /// GameEngineBread : Outline switch ( CustomDepthStencilValue ) { case 1 : RHICmdList.SetDepthStencilState( TStaticDepthStencilState< true , CF_Always, true , CF_Always, SO_Keep, SO_Replace, SO_Replace, false , CF_Always, SO_Keep, SO...

Draw outline

Image
Step 0. We will use a stencil buffer to draw outlines. Step 1. First of all, enable stencil buffers.  Menu -> Edit -> Project Settings -> Custom Depth-Stencil Pass -> set 'Enabled with Stencil' For each actor that you want to draw with outline,  Select Actor in viewport -> See Details Windows-> Check 'Render Custom Depth Pass'  Select Actor in viewport -> See  Details Window-> Change 'CustomDepth Stencil Pass' to 'Enabled with Stencil'. There are many ways to draw outline, but this is the best material to start : https://answers.unrealengine.com/questions/316814/how-to-hide-outline-post-process-effect-behind-obj.html This is a little enhanced version. Draw each line with a different color.  Step 3. Near outline object removes other outlines. Maybe it is not what you want. We can fix this with Unreal Engine code modification. It's too long to describe now, so I will show you it next post. ...

Change Material Parameters in Runtime

Image
Step 0. You can change materials of post process volume but it's very hard without native code. Using 'Post Process Component' is more simple and working without c++. Step 1. Add a 'Post Process Component' to my PlayerController. Step 2.  - Add a member variable. Type is 'Material Instance Dynamic'.  - On BeginPlay, Create a new instance and make the post process component of this controller use it.  - Add Some key events for testing.

Screen Wave Effect Material

Image
Step 0. Let's make a screen wave post process material. It's good for dizzy or drunken effects. Step 1. This is the final unreal engine material. In this time, I made horizontal wave nodes only. Step 2. To avoid boundary error(stretching), need more operations. You can see the modified material in the image below. It is not perfect, but it tells you how it works.

Screen Mosaic Effect Material

Image
Step 0. Let's make a simple mosaic material. Step 1. This is the final material.  You may modify 'Fill Rate' parameter only in game. Step 2. How to setup post process volume : Screen Ripple Effect Material Step 3. We need to change material parameters of the volume in game again...  But I will show you later.

Screen Ripple Effect Material(Fixed Version)

Image
Step 0. In this post, creates a material for use in the water. We need...  - Vertical/Horizontal waves.  - The length and time must be adjustable. Step 1. This is the final material. It's Unreal Engine 4 material but you can convert it for Unity Engine too. Step 2. Setup a Post Process Volume. Find Post Process Volume and drag to the level. Check unbound. Add the material to blendables array. Step 3. We need to change material parameters of the volume in game. I think it is not simple to describe it now, so, I will show you other post.